Friday, December 30, 2011

Tomato Soup ~ Comfort Food Series

One of my favorite television shows to watch when I'm feeling like being a creative chef is Everyday Italian on the Food Network hosted by Giada De Laurentiis!!  She has a way of making all the recipes she demonstrates seem achievable and absolutely scrumptious to boot!!

The other day she made a homemade Tomato Soup.  The only drawback of this show is that you have to really pay attention or DVR it because there is no written recipe to accompany any of the shows (that I know of). 

Tonight I thought I would try my hand at re-creating the soup she made on an earlier episode this month.  This is how I did it, may not be exactly like hers, but I must say it turned out pretty darn good and my hubby ate three bowls and raved about it!! 

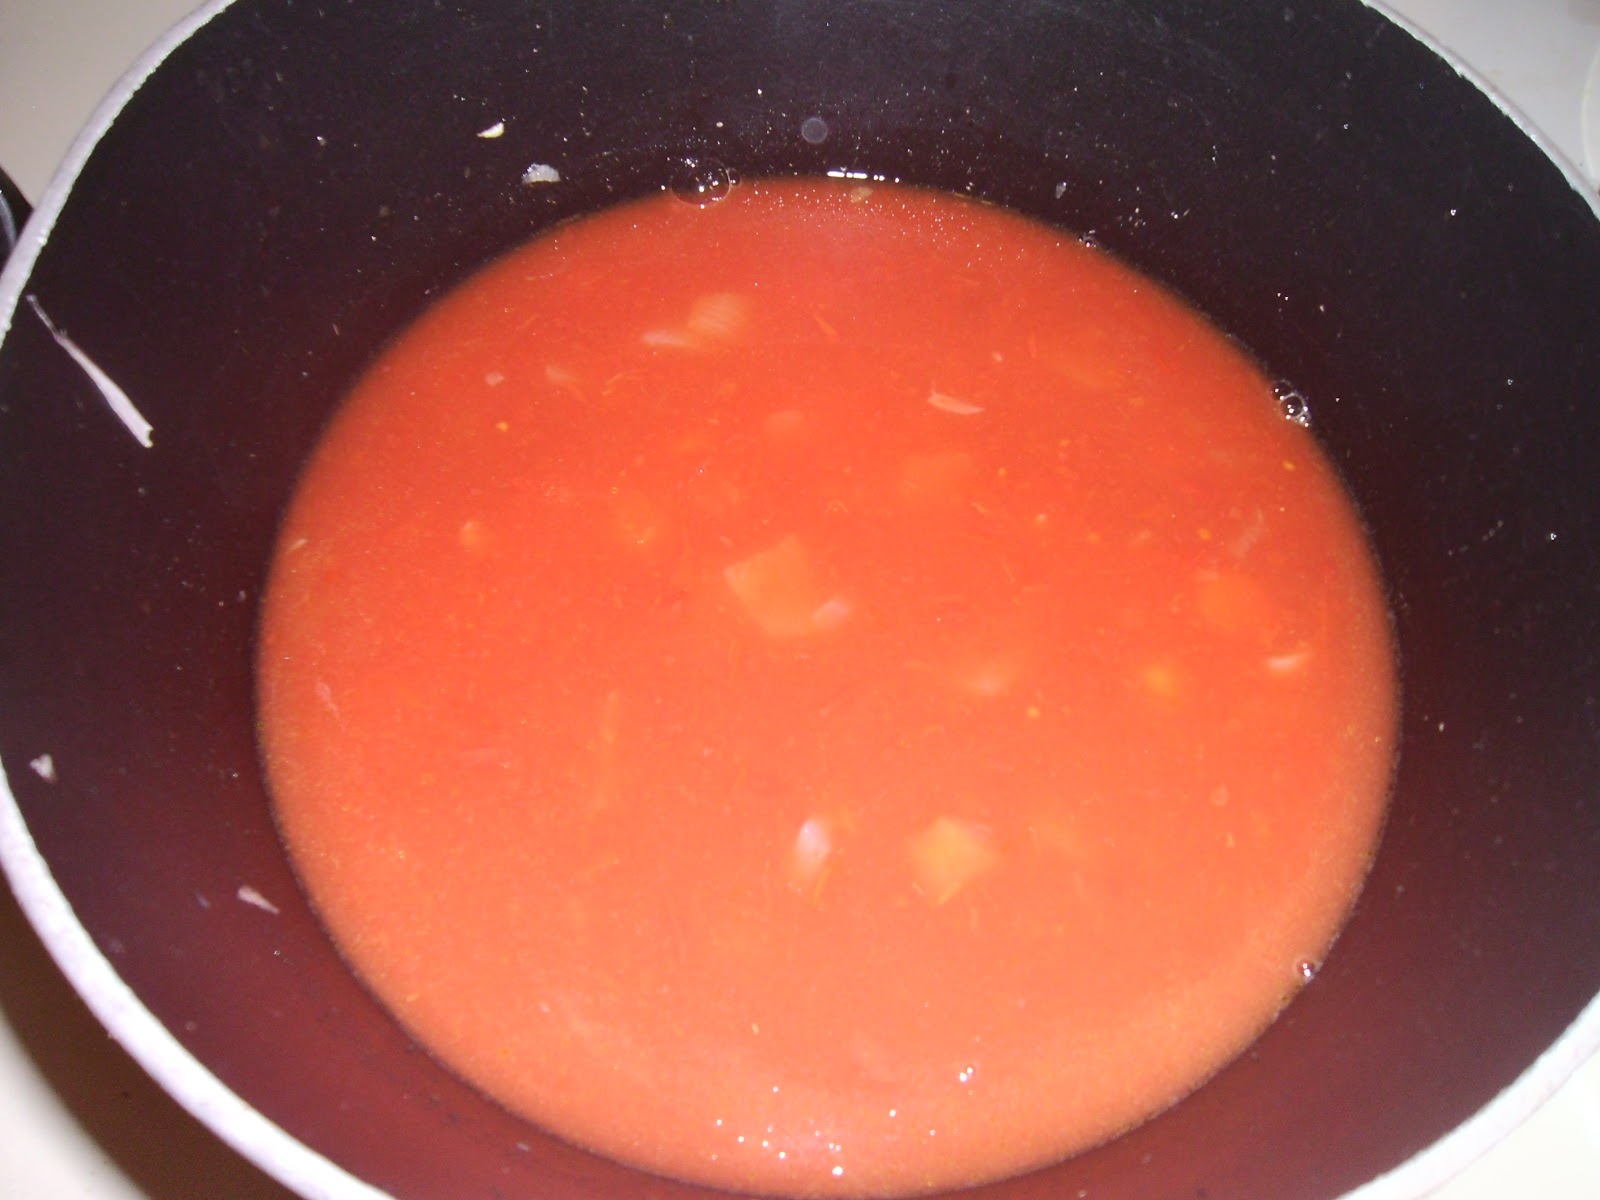
(This is what my final version looked like...along with a yummy grilled cheese sandwich)

So here's my take on her  "recipe"

1 24 oz can crushed tomatoes (for my friend Jackie, you can use canned tomatoes, it may take a jar and a half or even two and you should probably run them through the blender or use a potato masher to "smush" them)
2 carrots - peeled and chopped into small rounds (or as in my case I used about 9 baby peeled carrots)
1 white onion, finely chopped
2 garlic cloves, minced
1 carton stock (vegetable or chicken, I used chicken)
3 T butter

I will also make it a point to say that I did not have to add ANY seasonings whatsoever and it was absolutely perfect, just the right amt of everything all by itself!!


Using a large stock pot, start melting your butter.  Add your chopped onion and garlic to simmer.  Let them simmer for about 8 - 10 minutes on med low. 


Add carrots and let simmer/saute for another five minutes.  Add your whole carton of stock and your canned tomatoes.  Turn your heat up to med high and let simmer for at least thirty minutes, stirring often.  Stir with a wooden spoon.  It will thicken up quite a bit.


  She had an "immersion blender" and used it at the end to immerse in her soup and chop up/blend in the carrots and onions etc.  I do not own one, so I just got out my strainer and strained the soup into a large serving bowl and let the leftover tomatoes/onions etc stay in the strainer. (Technically if you really wanted to you could empty this into a blender and chop it all up really quickly and it would do the same thing)  It was really really delish and really pretty simple to do.  I think it would make a great base for spaghetti sauces etc....I will be experimenting in the following weeks to see what else I can come up with and possibly start canning some soup/ spaghetti sauces!!

Happy Cooking!!

If you have any categories of foods that you would like to see some new recipes for please leave me a comment and let me know!!

Thanks for popping in!! :)

Tuesday, December 20, 2011

~* Ever Evolving*~

I think about that saying

 "The only thing constant about life is CHANGE"

In case you haven't noticed I LOVE to write!!

I'm ready to start taking my blog in a new direction........

Stay tuned..........

:::GRIN:::

Wednesday, December 14, 2011

Elmwood Gardens Bridal Show 2011

My daughter and son in law had the pleasure of being asked to be "Bridal Models" this last weekend at one of East Texas' premiere Bridal Venues.  I attended of course because how could I resist not seeing both of them again all dressed up?!?! 

This is a video taken by an outstanding videographer of the event (my daughter Jackie is the "bride" getting out of the car and her husband Cody got to be the "groom" again, they've actually been married for a year this last November :) :

Elmwood Gardens 2011 Bridal Show Highlight Video from Nathan Browning on Vimeo.


and if you check out the Facebook page of Donna Cummings Photography you can see quite a few more photos of Elmwood Gardens!!  Facebook ~ Donna Cummings Photography and the Facebook link to Elmwood Gardens is Facebook ~ Elmwood Gardens

Tuesday, December 13, 2011

Running like a chicken.....

with my head cut off.....

we've all heard that saying , and I hate to admit it, but it sure does apply to me these last few weeks!!  Thankfully we are not having our actual "Family Christmas" until New Years Day just because of the way everyones work schedules fall around here.  This is the first year I think I've ever been SUPER EXCITED about having an extra week to finish up all of my projects!! 

Here are some of the projects I will be busy on for the next couple of weeks!!

The first is to totally redo my grandsons bed.  It's a single size wood "Captains Bed" that pretty much looks EXACTLY like this one.  My job is to transform it into a "FIRETRUCK BED".....I will be repainting it Fire Engine Red....Painting Tires on it, Painting on one end a silver grille and putting working headlights on....and then we will add a ladder and slide.  Amazingly all it will cost is about $100.00 which is MUCH less than what it costs to buy a firetruck bed!!  Since he is moving into a new house and a whole new room he wanted a "new theme".....and far be it from MiMi to not make sure he has what he wants LOL!!  Be looking for the before and after photos!!

I also saw on Pinterest the other day  how to make a DIY LEGO TABLE ~ I am going to make one for my grandson for Christmas...they are super easy....basically just paint an end table and then glue down four square lego "bases" on top and then VOILA they have a nice big table to play with their legos on...SUPER EASY....


and thennnnn...I want to make my brother one of these for his cat:  All you do is paint a popcorn tin a solid color and then do a stencil in whatever word you want....and VOILA they have a place to store cat/dog food!!  And then I want to make him one of those little fleece beds for his cat....at this point though I might could just buy it one and save the time!!

Popcorn containers spray painted for dog food storage.

and then I want to make one of these for each of my girls and sons in law ~ just because they are SUPER CUTE!!

You print out maps of where they met, where they married, and where they live now, and then frame them

where you met. where you married. where you honeymooned.

Those are just a FEW of the ideas and projects I want to get done between now and our family Christmas on January 1st!! 

If you don't hear much from me between now and then you will know I am knee deep in paint and glue!!

Merry Christmas Friends!!


Friday, December 2, 2011

Christmas Cookies


This is my favorite time of year, I love the hustle and bustle, spending time with friends and family, decorating my home and making memories that will last a lifetime.  Not to mention celebrating our Savior's Birth!! 

I love to cook, and REALLY love dessert, and who doesn't?!?!

Thought I would share a few recipes to start your holidays out right!!

ROLLED SUGAR COOKIES

1 1/2 CUPS BUTTER, SOFTENED
2 CUPS WHITE SUGAR
4 EGGS
1 TSP VANILLA EXTRACT
5 CUPS ALL PURPOSE FLOUR
2 TSP BAKING POWDER
1 TSP SALT

DIRECTIONS:

In a large bowl, cream together butter and sugar until smooth.  Beat in eggs and vanilla.  Stir in the flour, baking powder, and salt.  Cover, and chill dough for at least an hour or overnight.
Preheat oven to 400 degrees.  Roll out dough on floured surface to 1/4 inch thickness.  Cut into shapes with cookie cutters.  Place on ungreased cookie sheet 1 inch apart.
Bake 6 - 8 minutes, cool completely. 

Makes 5 dozen

SUGAR COOKIE ICING

1 CUP CONFECTIONERS SUGAR
2 TSP MILK
2 TSP LIGHT CORN SYRUP
1/4 TSP ALMOND EXTRACT
ASSORTED FOOD COLORING

In a small bowl, stir together confectioners sugar and milk until smooth.  Beat in corn syrup and almond extract until icing is smooth and glossy.  If icing is too thick, add more corn syrup. 
Divide into separte bowls and add food coloring to desired intensity.  Dip cookies or paint them with a brush. 


THUMBPRINT COOKIES


  • 1 CUP OF BUTTER (2 sticks or 8 ounces), room temperature
  • 1/2 CUP OF SUGAR
  • 2 EGGS, ROOM TEMPERATURE
  • 1 TSP VANILLA EXTRACT
  • PINCH OF SALT
  • 2 CUPS OF FLOUR 
  • 1 CUP OF FINELY CHOPPED NUTS (OPTIONAL)
  • 3/4 CUP OF YOUR FAVORITE JAM
  • Parchment paper
DIRECTIONS
 Cream the butter and sugar on high speed for about 3 minutes.
 Separate the eggs. Add the yolks and vanilla extract to the butter mixture. If using nuts place the egg whites in a shallow dish on the side and whisk them until bubbly and frothy (the egg whites will be used to keep the nuts on the cookies).
 Add the flour and salt. Mix until just combined. Place the dough in the fridge for 30 minutes and preheat the oven to 350F.
Roll the dough into balls about 1 inch in diameter. If using nuts, dip the balls into the egg whites then roll them into the nuts until covered. Place the balls on parchment lined cookie sheets. 
 Press down with your thumb to make a small well in the center of the cookie. Do not press too hard or the cookie will fall apart. Fill with 1/2 teaspoon of jam.
 Bake for 12-15 minutes or until slightly firm. Allow to cool for a few minutes on the cookie sheet to firm up before moving them to a wire rack to finish cooling.
Makes 2 dozen cookies.

Cinnamon Spirals

Cinnamon Spirals

3/4 CUP BUTTER, CHILLED
3/4 CUP GRANULATED SUGAR
1 EGG
1 TSP PURE VANILLA EXTRACT
1 2/3 CUPS ALL PURPOSE FLOUR
1/3 CUP CORNSTARCH
1 TSP BAKING POWDER
1/4 TSP SALT
Filling
1 CUP PACKED BROWN SUGAR
2 TSP GROUND CINNAMON
2 TBSP BUTTER, MELTED


. Preheat oven to 350ºF (180ºC). Line baking sheets with parchment paper.
Beat butter and sugar until fluffy. Add egg and vanilla. Beat well. With mixer on low, gradually add flour, cornstarch, baking powder and salt. Divide dough in half; press into discs. Wrap in plastic wrap and refrigerate for 1 hour or until firm.
 Filling: mix together brown sugar and cinnamon. Drizzle butter over, stirring until mixture is well moistened.
 Roll out 1 disc of dough into 14” x 5” (36cm x 10cm) rectangle between 2 sheets of waxed paper. Spread half the filling over, leaving slight border at long end. Brush ends with water. Using waxed paper as support, and starting from the long edge, tightly roll up dough jelly roll style, pinching ends. Wrap firmly in plastic wrap and chill for 30 minutes or for up to 24 hours. Repeat with remaining dough and filling.
 Unwrap dough and slice into ¼”(5mm) slices. Place 1“(2.5cm) apart on prepared baking sheets.
 Bake in centre of preheated oven for 12-15 minutes or until light golden.
Makes 5 dozen


LinkWithin

Related Posts Plugin for WordPress, Blogger...